Showing posts with label Drawing Anime. Show all posts

How to Draw Clothes

The most important thing to consider whenever you are drawing clothing or any type of fabric is the direction the fabric is going to be pulled in. Folds are caused wherever the fabric is being stretched or pulled; figure out how exactly you want the fabric to move, and the rest is pretty easy. Always remember to consider the figure beneath the clothing; the cloth should reveal the shape of the figure beneath. I'll go into more detail on this later.
At the left are some examples of basic types of folds. Notice the movement of each example shown; the fabric flows downward on the top left two, for they are being pulled down by gravity. This type of fold would be on something that hangs loosely, such as a cape or long shirt. On the lower left and upper right examples, the fabric is not only pulled by gravity, but stretched to the left (probably by an arm that is underneath the clothing). The folds become more horizontal than vertical the further it is stretched. Also notice how sometimes the folds are nested within one another. This will often occur at joints or areas in which loose clothing is bunched up. The lower right picture is a slightly more complex example of a more inert piece of cloth being pulled in a viarety of directions. Notice how the folds follow the direction that the cloth is being pulled in.
Here are a few more examples of basic fold shapes. On the left, the cloth is being pulled downwards by gravity and to the right by wind or motion. On the left, the long strip of cloth is bunched up near the top. Remember to use shading to give your subjects more form. Generally, you shade along a fold line, or on any places that you think a shadow would be cast. This takes some getting used to. It helps to look at actual folds sometimes to see where to shade. Sometimes, I'll sketch the drapes or a towel hung over a chair just to practice and get a better feel for how clothing is shaded.

Kanji de Manga Vol 3 cover image
Here are a few more random examples, of a bow and some sleeves. The most important thing to note here is the shape of the folds at the joint of the sleeve in the middle.
These are some more complex, overlapping and nested folds. The more detail you put into the folds, the more interesting it will look. On the left, notice how the fabric bunches up where it is tied together; the weight of the fabric pulls it down and causes extra creases and folds to form where it is gathered together. The tie itself is drawn with lots of detail, and the cloth beneath it blows loosely in the wind. The fabric is shaded around the folds and in the crevices formed by the cloth. On the picture to the right, a length of fabric is draped upon the floor; notice how the folds nest in one another and overlap, creating an interesting effect.

Kanji de Manga Vol 3 cover image
Another thing I want to point out is the thickness of the fabric in question. The fabric on the top example appears thinner than the fabric in the lower example. Take note of both collars. On the top, the circular rim of the collar connects directly to the rest of the collar, while on the bottom, there is a space between the circular rim and the vertical part. The same applies to the edges of the cape. While on the top example, the edge is crisp and thin, on the bottom example there is extra space between the rim and the rest of the cape. This extra space makes the clothing look more thick and heavy.


Kanji de Manga Vol 3 cover image
Now that we know a few of the basic shapes of folds in fabric, let's move on and see how clothing should look when it is actually being worn by someone. At the left, we have an example of a very loose, draping sleeve. As mentioned before, the main thing to consider is which direction the fabric will be pulled. The sleeve here is being pulled in two main directions: downwards because it's pulled by gravity, and to the left because its attached to the main garment and is being stretched across the arm and torso. The folds in the sleeve will follow the direction that the cloth is being pulled. Notice also how the cloth bunches up around the wrist. This isn't necessary, but it does indicate the length and looseness of the sleeve.


Kanji de Manga Vol 3 cover image
Here are three more sleeve examples. These sleeves are not as loose as the one shown above, and all stick pretty close to the arm. In these examples, the cloth is stretched from the arm to the shoulder and torso, rather than being pulled down mainly by gravity. There isn't enough material to be pulled down too greatly. Since the fabric is pulled horizontally, the folds should reflect this. The best example is the top picture here; notice how the folds move towards the shoulder instead of towards the ground. The sleeve in the middle picture is a little looser, and is pulled down by gravity more. The sleeve in bottom picture is big and loose, but is rolled up at the elbows, and thus doesn't hang and droop as much as the sleeve in the previous example.


Kanji de Manga Vol 3 cover image
These are some miscellaneous bits of clothing that didn't fit into any of the other sections of this tutorial, but that I wanted to include anyway. In all these examples, try to identify where the cloth is being pulled towards and in what direction (for example, is it being pulled roughly towards the shoulder, or draping loosely over the subject?). Always remember to shade wherever the light doesn't fall, such as grooves, areas inside the folds, and places where the cloth overlaps.


Kanji de Manga Vol 3 cover image
One small but important thing I would also like to go over before continuing is the effect that stripes can have. If you are drawing clothing that has stripes or a pattern on it, make sure that the pattern moves along with the rest of the fabric. Where the cloth bends, the stripes and patterns will bend, as well. This can be difficult to draw and shade, especially when you are dealing with complex patterns, but it can add a really nice three dimensional look to your picture.

Kanji de Manga Vol 3 cover image
Now that we know some basic shapes and know a little more about how clothing should fit on your subject, let's work on the actual parts of your character's wardrobe. We'll start off by going over basic shirts. Whatever type of shirt you draw, there are some basic places where folds will occur. Sleeves will be stretched towards the shoulder. Fabric generally gathers and bunches up around the armpits and waistline. If you are drawing a character with a heavy jacket or a loose shirt, the fabric should be thick and baggy and full of folds and creases, while if it is a tighter fitting garment, the clothing will stick pretty close to your subject (which is why it is important to be able to draw bodies; I have found that you cannot always cover up your entire character with really loose clothing to hide the fact that you aren't very strong in figure drawing. ^_~)


Kanji de Manga Vol 3 cover image
Here are some better examples of various shirts and clothing for the upper body. Notice that while some clothing fits closer to the body than other clothing, you still see many folds where ever the fabric is being stretched. Generally, you'll see folds the most at the armpits, upper portions of sleeves, waistlines, and depending on how tight the outfit is, the chest (as shown in the lower two examples). Also make sure that any seams that are visible on the clothing follow the shape of the cloth and the character that is wearing it. ^_^


Kanji de Manga Vol 3 cover image
All right, let's work on the pants (something that I personally sometimes find a little daunting... ^.^;) I have noticed that guy's pants tend to be a little looser, while girl's pants cling closer to the subject. Also take note that female's rears tend to be more round, while guy's are tend to be flat and squared off (a rather strange observation, I know. ^_^;) No matter which gender you are drawing, the fabric will gather around the lower waist, knees, and ankles. The cloth around the upper and lower legs is generally pulled straight down by gravity and won't have too many folds, unless the leg is lifted up, in which case you'll have folds similar to the sleeves on the previous page.


Kanji de Manga Vol 3 cover image
Here are two more examples of clothing for the lower body. The one the left is an example of really loose, baggy pants. The material has more folds than normal pants, and in this case gathers at the ankles. Notice how poofy the pants get below the knees. The example on the right is just showing how no matter what your character is wearing, you need to consider the form of the figure beneath the clothing. In this case, the clothing is relatively tight, but hangs down past the knees, and thus is drawn a little tighter around the rear. Also notice how the loose fabric bunches up right above and below the belt. That concludes my tutorial on drawing clothing. It isn't the most organized tutorial, but I'm hoping that it covers enough areas so that it can be of some help to you. ^_^

How to Draw a Body for beginners

 STEP 1.

When drawing a male figure, keep in mind that they are less curvaceous than females. Their bodies are box-like and defined. They have more muscle mass and agility. Their shoulders are broader, creating a sharp and bold physique all together. From the side view, you can see how the body is perfectly straight with no prominent curves like women. The grey line indicates the line of motion or 'balance' for the figures.
 
how to draw a body for beginners step 2

STEP 2.

Here's just a basic overview on three main body types for men. The first one is of course, the muscular or 'body builder'. The body has thin defining lines that indicate tone and definition of muscle mass. As we scale down to the average body, you'll see how the details because less intense. The pink arrows point to the lines which give the figure realism and depth. If you're going to draw a muscular character, I would consider viewing a mass amount of reference photos of muscular men.
 

STEP 3.

Female Anatomy Basics| The difference between drawing female figures, is that females are generally more 'curvy' than males. The hips and shoulders are almost ALIGNED perfectly when compared vertically to one another. It's best to observe references of the female body in motion to get a general idea on how it poses in diverse formats. If needed, get yourself a posable mannequin. Note* A typical height of a female is 6-7 heads. This means, if you stacked the size of their heads vertically, you'd have the average and logical height. Notice how the body is proportioned and the hips almost perfectly aligned with the shoulders. Note that female shoulders DO NOT sharpen and erect perfectly straight like the horridly drawn figure to the right. Observation is key!
 
how to draw a body for beginners step 4

STEP 4.

Breast Variations| Now, here's a quick front and side turnaround on how diverse sizes of breasts can take affect on the figure. We have the very small, average, above average, and large DD cup breasts. Because gravity is continuously active on objects; the breasts will sink downwards with a sort of protrusion at the tips (nipples). NEVER draw breasts bulging outwards as if there is a force pushing them outwards or upwards, as shown in the figures demonstrated in grey. Also, keep notice on the patterned lines that trim the middle of the breasts on each figure. This dictates how overlaying objects will morph within the shape of its parent (clothes, accessories, etc
 

STEP 5.

When drawing clothes on bodies, it's critical to keep in mind that clothing has different effects on the female and male bodies. It's also important to know the differences and principles of drawing these opposite genders. I would suggest heading over to my "how to draw anime bodies" tutorial that will teach you very basic limits on the female and male bodies. Again, females have curvier bodies, and of course 'breasts'. Their shoulders are also softer and smaller than men. Notice how male bodies are sharper with very broad shoulders. This is because, men are built to provide for the women; which means hunting, fighting, and traveling requires strength and endurance. Again, reference and observe!
 
how to draw a body for beginners step 6

STEP 6.

To begin this clothing tutorial, I would like to discuss the various types of bodies, and how they effect the clothes worn. Here we have three different bodies; one is stubby and chubby, the other is the average lean man, and the last is a muscular body builder. Observe carefully on how the same styles of clothes are effected by the shapes of the bodies. Notice that the stubby body has less wrinkles with slight indication of wrinkle at the tightest regions. The clothes stick to this body shape, emphasizing the features a lot more than the average body figure. Now, moving onto the middle figure, we see that there's a nice amount of wrinkles in the most active areas. The next figure, which is the muscular man, has the same application as the stubby body. The clothing sticks to most protruding part of body, which are obviously the muscles. The wrinkles are also stretched around the biggest of muscles. To further your observational skills, study lots and lots of references on how clothing effects the many varieties of bodies!
 

STEP 7.

Begin by drawing the body guides to create a workable frame. First, draw the head guide shape, then the torso and hip guides. Sketch in the guidelines for the neck, arm and to connect the top to the bottom.
 
how to draw a body for beginners step 8

STEP 8.

Using the guide you just made, draw the shape or define the shape for the girl's face. When that is done you can draw in the bang and some hair.
 

STEP 9.

We will now tackle the task of drawing out the body starting with the neck, shoulders, arms and then the torso. This is a female so the chest needs to be drawn in a feminine manner.
 
how to draw a body for beginners step 10

STEP 10.

We will add a top. For this female model it's a simple halter. Add the cleavage and then draw the collar bones.
 

STEP 11.

We will sketch out the rest of the body shape beginning with the back arch, then draw the butt shape and then finally the thighs and crotch. Don't forget to draw the forearm as well.
 
how to draw a body for beginners step 12

STEP 12.

Finish off this lesson by drawing the left arm and then her right hand or fingers. We will sketch in some detailing to add realism to the body like the bellybutton, and bone definition for the pelvic area. Sketch in a hairstyle you like or draw the short cut you see here. When you are happy with your drawing you can erase the mistakes and guides.
 

STEP 13.

That's it, you are all done. Now you can color in your body drawing or use what you've learned to make your own character/figure.
 

Tip! For Drawing Male Characters

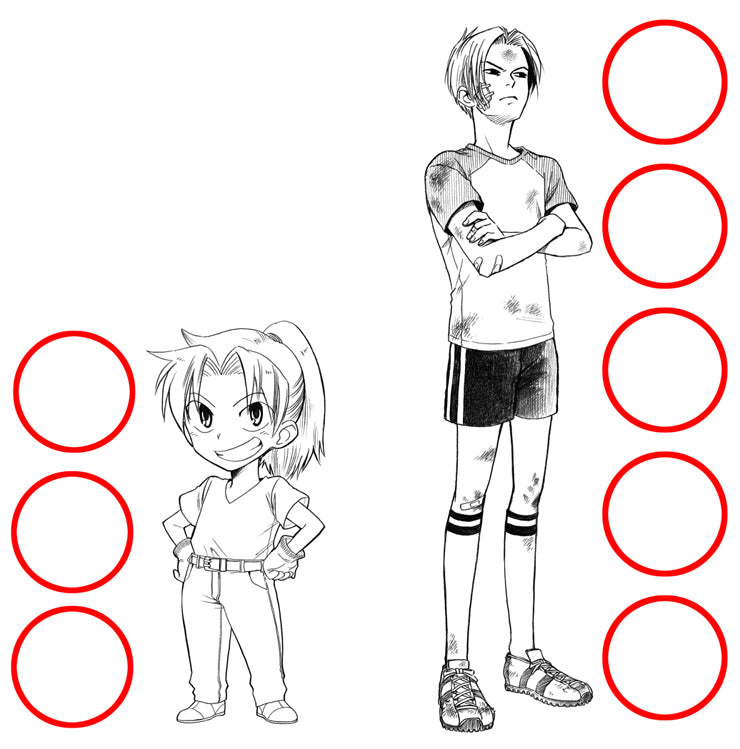
Male manga characters head-size ratio
Drawing manga-style male characters can be a bit more challenging than drawing female characters because there are usually more choices you can make. But the basic approach is the same. You might already know that any anime/manga character is proportioned by counting the number of "heads tall" they are. In other words, a chibi character will only be the height of 2 to 3 times the size of his or her head, and typical "cartoony" manga characters are usually 5 to 7 heads tall. More realistic (and occasionally shoujo-style) characters are sometimes up to 8 heads tall. Keeping to these scales will assure your characters — male or female — look properly proportioned.


Male manga characters body shape
Another difference to be aware of is that female bodies tend to curve in at the stomach and flare out at the hips, and accentuating this is a sure giveaway that your character is a female. Males, on the other hand, have torsos that do not curve in much, and should even expand out if you're drawing a beefy or overweight character. Pay attention to the legs too — instead of drawing nice, curvy calves, you will want to use slightly more blocky shapes to add muscle, or simply draw the legs much skinnier and straighter (Monkey D. Luffy of One Piece is an extreme example). Also, male shoulders tend to be broader (they expand out farther from the head), and occasionally very muscular characters will have a neck that sort of expands out into the shoulders (any Dragon Ball Z character is a good example).

The World's Most Interesting Manga Man
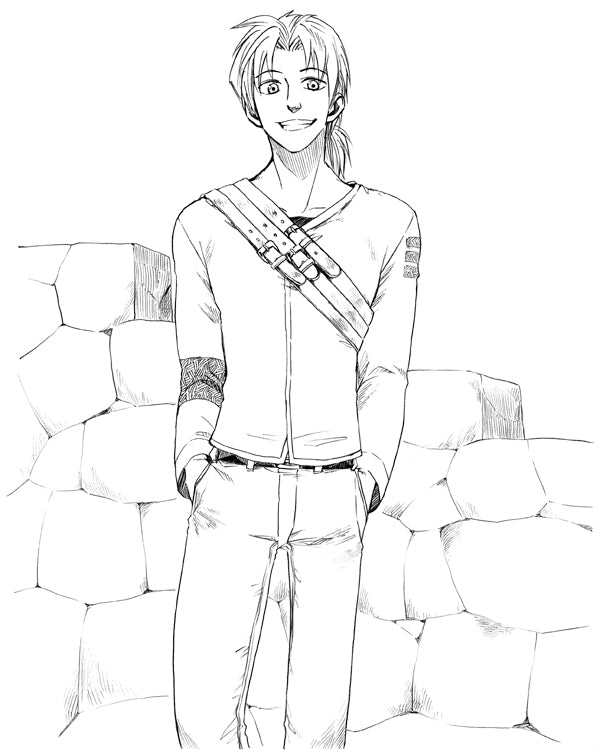
This brings us to our final point: What kind of male character are you drawing? In manga, you seldom see female characters that aren't tall, thin and pretty, but male manga characters can run the gamut from being short and impish, to fat and ogreish, to tall and striking. Choose what image you want your character to project and really accentuate the physical attributes that convey that image. If he's a real geek, make him hunched over with his shoulders almost behind his head (like L from Death Note). If he's a dashing young man, give him an 8-head-tall figure with long, thin legs and a nice thin torso. The possibilities are endless, but trying to draw different kinds of figures is the best way to learn which kinds of bodies create various impressions.

How to Draw Mew Mint

Tokyo Mew Mew

 STEP 1.

Let's begin like we always do by drawing the head, torso and hip guides. You will then sketch in the limb guidelines next.
how to draw mew mint from tokyo mew mew step 2

STEP 2.

Up next, draw in the shape of the face and then draw the big eyes by using the facial guidelines. When that is done add a mouth and then draw Mint Mew's neck shape followed by the necklace around the neck.
how to draw mew mint from tokyo mew mew step 3

STEP 3.

In this step you will take your time as you draw out Mint Mew's head which is also her awesome hairstyle. She is almost always wearing her hair in two buns. The bangs and hair on the sides should be shaggy.
how to draw mew mint from tokyo mew mew step 4

STEP 4.

Let's start the drawing process for the upper body beginning with the shoulders and arms. You will then draw the cuffs on her arms from the one piece dress she wears.
how to draw mew mint from tokyo mew mew step 5

STEP 5.

We can now draw in the hands which are gloved like you see here.
how to draw mew mint from tokyo mew mew step 6

STEP 6.

Finish the upper body by drawing the shape of her torso, hips and waist. Add the designing to the dress and the cuffs like so.
how to draw mew mint from tokyo mew mew step 7

STEP 7.

It's now time to draw the legs in a together bent style. Draw the boots or feet and then add detailing to the boots.
how to draw mew mint from tokyo mew mew step 8

STEP 8.

Finish the dress and add a band around the thigh. When you are done with that task you can draw in the wings and add detailing to the wings Erase your mistakes and guides then you're done.
how to draw mew mint from tokyo mew mew step 9

How to Draw Mew Lettuce

 STEP 1.

Make the guide shapes for Lettuce like so. This should consist of a head and torso. Sketch in the facial guidelines and then draw the limb guides.
how to draw mew lettuce step 2

STEP 2.

We will now draw the shape of Mew Lettuce face, and then draw in the hair which parts and arches. The ends of her hair should be pointed, you should also draw the lobes of her ears as well.
how to draw mew lettuce step 3

STEP 3.

We will now draw the large eyes with the upper lids being thicker. Add the eyebrows, nose and mouth.
how to draw mew lettuce step 4

STEP 4.

Draw the shape of the neck, then draw in her shoulders, some of the torso and then draw the cuffs for her dress. Add detailing to the neck and proceed to step five.
how to draw mew lettuce step 5

STEP 5.

We will now draw the arms and some of the tails for the dress. Mew Lettuce's dress is blowing in the breeze.
how to draw mew lettuce step 6

STEP 6.

For the last drawing step all you have to do is draw in the legs and then her boots. The boots are almost knee high. Draw the rest of her clothing and when you are satisfied with the results you can begin to clean up the drawing by erasing the mistakes and guidelines.
how to draw mew lettuce step 7

STEP 7.

Here is Mew Lettuce when you are all done. Now you can go ahead and color in this drawing of another Tokyo Mew Mew character.

How to Draw Mew Zakuro

STEP 1.

Make the guides for Mew Zakuro's body. This consists of three shapes, one for the head, one for the upper body and another for the lower part of her body.
how to draw mew zakuro step 2

STEP 2.

We will tackle the head and face completely by using the face guide to define the structure of her face. When that is done draw in her eyes, nose and then the mouth. You can now sketch out her hair starting with the bangs. Draw in the length of her hair next, and move to step three.
how to draw mew zakuro step 3

STEP 3.

Draw in the ears and add detailing inside the ears. You can then draw the shape of her neck, then draw the outline of her body starting with the shoulders, back, leg and chest.
how to draw mew zakuro step 4

STEP 4.

You can now draw in the rest of her arm, then draw the chest, stocking line on the thigh and define or detail the upper part of her body which is the clothing.
how to draw mew zakuro step 5

STEP 5.

You can now draw the legs which are bent up to the chest. Her boots are thigh high and the heels are semi thick. Add lining down the front of the boot and proceed to step six.
how to draw mew zakuro step 6

STEP 6.

For the last drawing step all you need to do is sketch in her thick, puffy foxy tail. Erase your mistakes and all the guides before you go.
how to draw mew zakuro step 7